In order to clean your katana and replace its fittings, you need to disassemble it. But taking apart your Japanese sword isn’t as difficult as you might think.
Table of Contents
How to Dismantle a Katana?
This guide will help you dismantling your sword easily and extremely quickly. It only takes 6 simple steps and can be completed in less than five minutes.
1. Prepare Your Tools
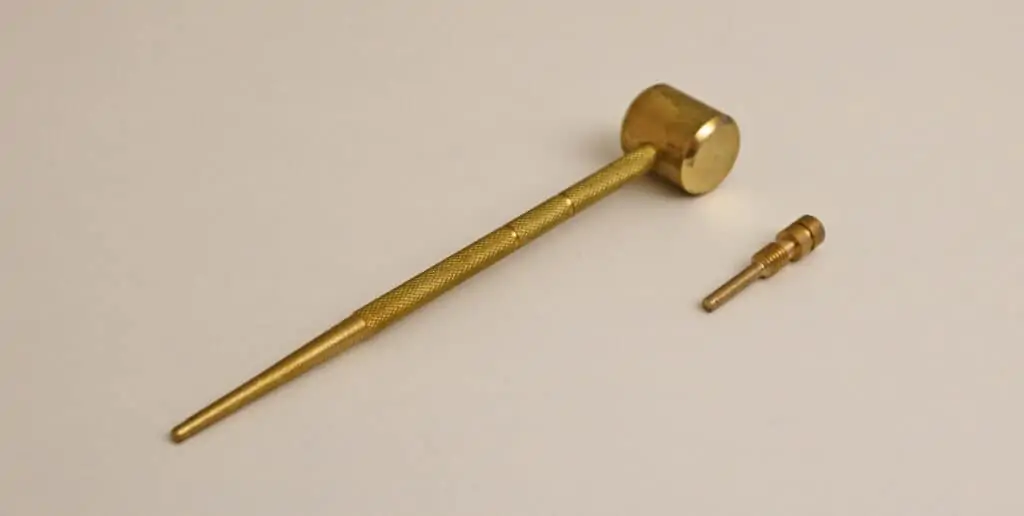
Before you start working you should get all the required tools. To disassemble a katana, you only require a punch and a small hammer.
These items are typically included in every sword maintenance kit (the punch is screwed on top of the brass hammer).
As you are working on a live blade you should be very careful and pay close attention. Otherwise, you might hurt yourself.
2. Locate the Mekugi
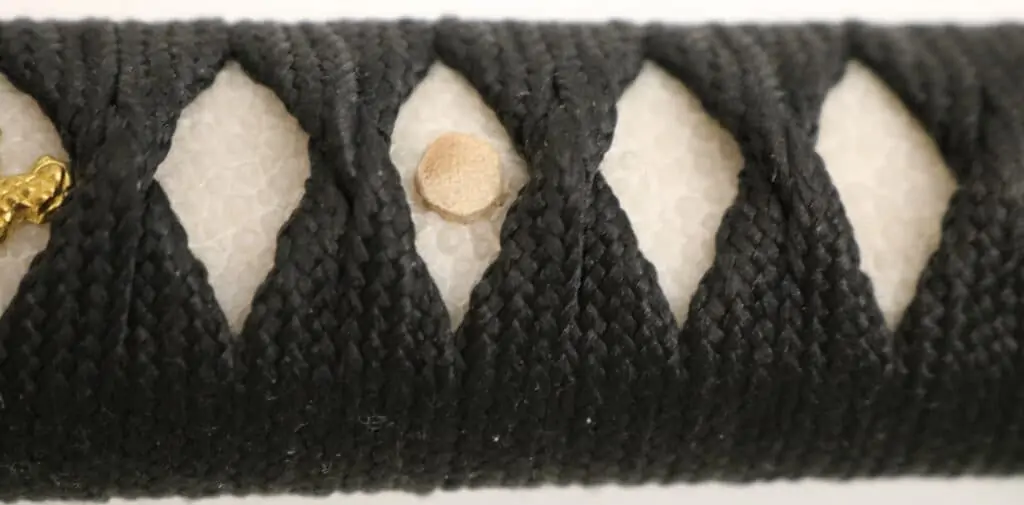
Take a look at the handle (tsuka) of your sword and locate the pegs (mekugi). Traditional Japanese sword only have one mekugi. Modern reproductions almost always have two pegs.
The mekugi might be hidden under the handle wrap (tsukaito). If this is the case, you have to shift the tsukaiuto to uncover it.
Once you located the mekugi, flip the sword and check the other side of the peg. Some mekugi are tapered.
So, one side of the mekugi has denser pores, is larger and slightly darker than the other. However, this isn’t always the case and your katana might have straight pegs.
3. Remove the Mekugi
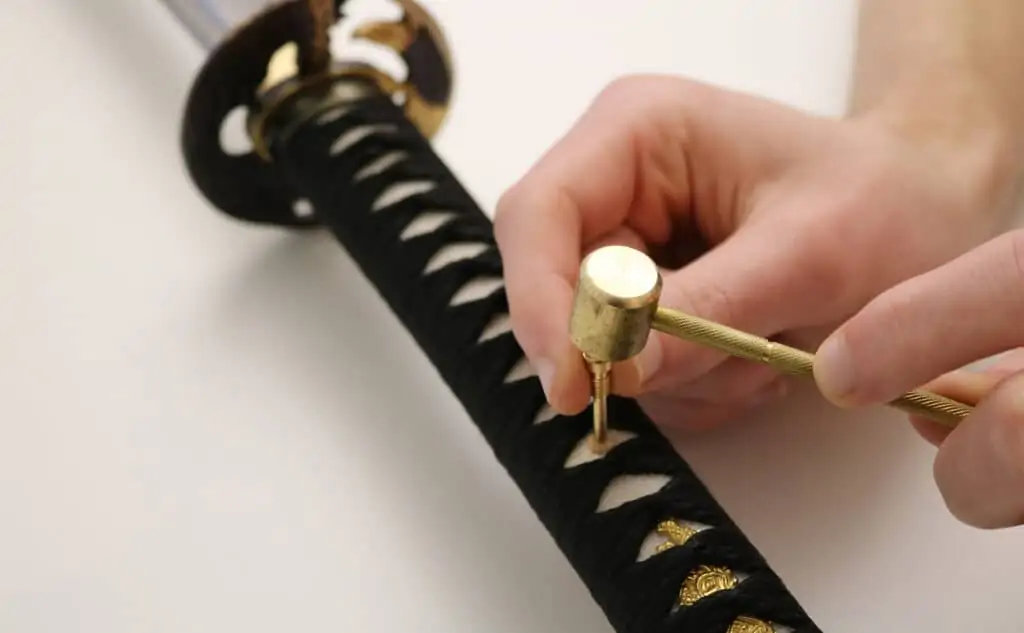
Tapered mekugi can only be removed in one direction. Place the punch on the smaller side of the peg. If your Samurai sword has straight mekugi the direction you punch doesn’t matter.
Take your hammer and hit the rod until the mekugi comes out. The force required differs from sword to sword.
Start with careful and gentle hits and gradually increase the force if your previous strike didn’t show any effect. Some mekugi are hard to remove and require you to use a big hammer and hit extremely hard.
Repeat this process if your Japanese sword has multiple pegs. This is the perfect time to inspect your mekugi for damage and when needed replace them.
If your mekugi is stuck check out the corresponding info in the FAQ section below.
4. Remove the Tsuka
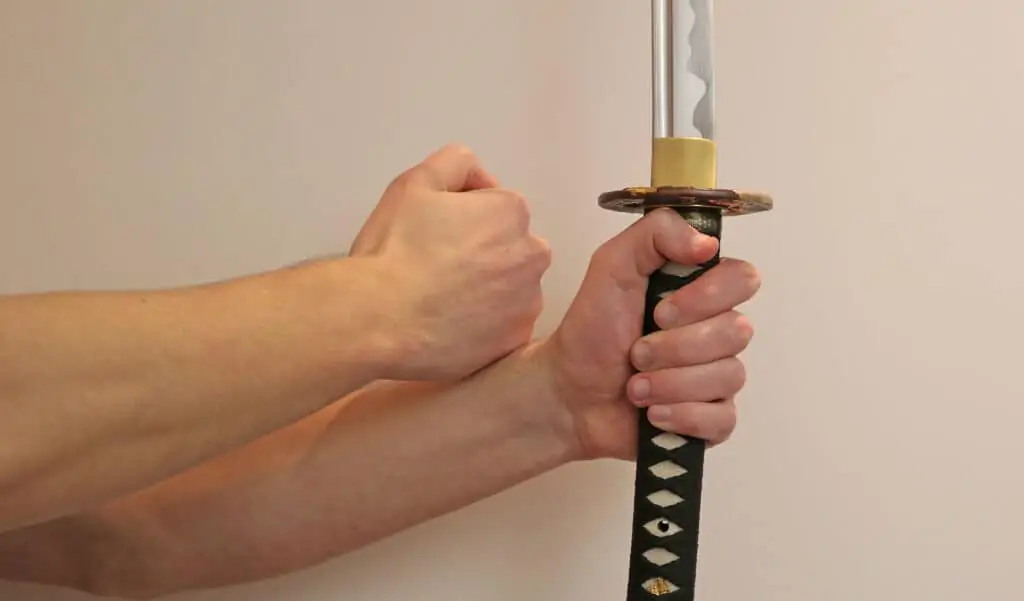
As we have removed the pegs we can proceed and take off the tsuka (handle).
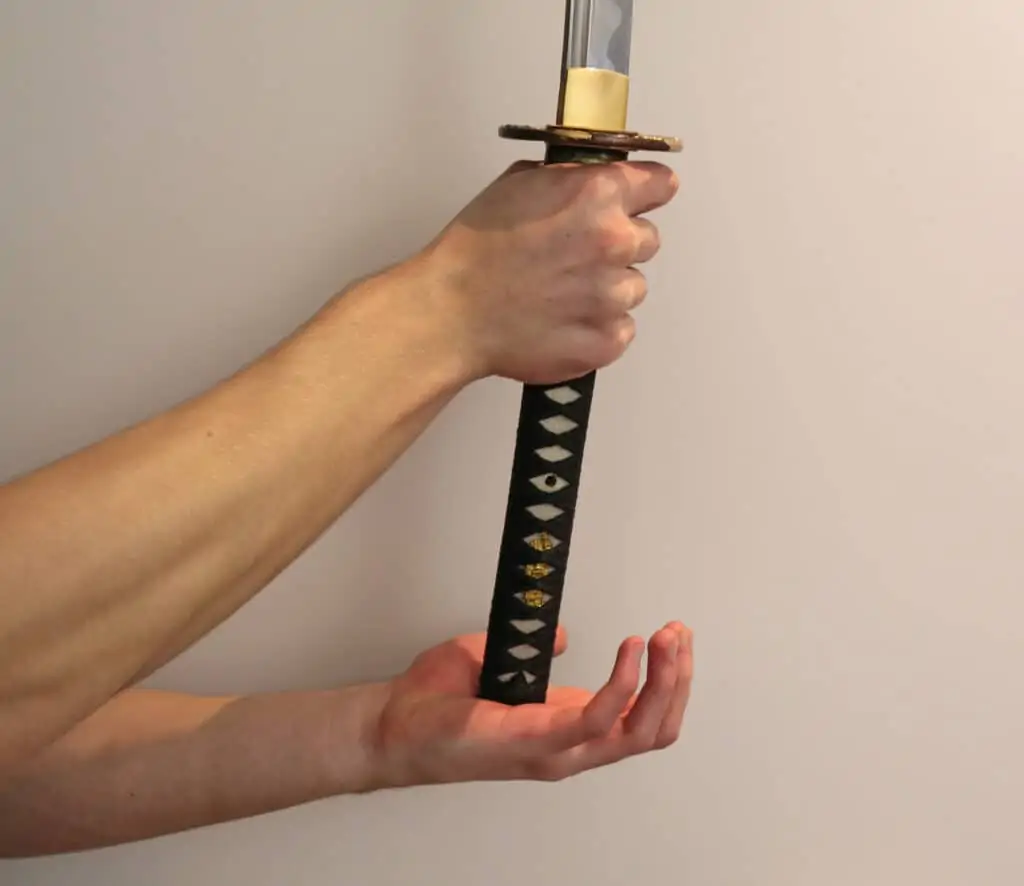
Hold your sword vertically in one hand. Make sure that the edge is facing away from you. Tap that hand with your other hand until the tsuka comes loose. All that is left is to slide it from the nakago (tang).
If this doesn’t work check the FAQ at the end of this post.
5. Remove the Blade Fittings
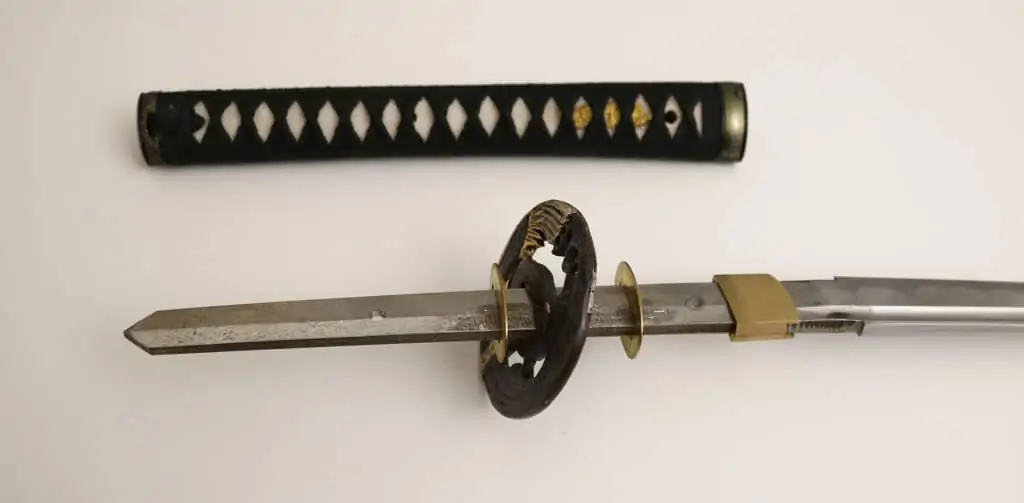
After successfully removing the handle you can now take off all the fittings (koshirae). These are the two seppa, the tsuba (guard) and the habaki (blade collar).
When disassembling make sure to keep track of the order and orientation of the fittings (the seppa may be different).
So now you can thoroughly clean your blade or replace the fittings.
If the tsuba or habaki is stuck you can apply the same technique as mentioned in the FAQ about the tsuka.
6. Reassemble your Katana
In order to reassemble the katana, you have to slide the fittings on the tang in the correct order. First the seppa, followed by the guard, then the other seppa and lastly the handle.
Pay attention that the seppa have notches at the edge. These should be facing away from the guard.
Now grip the handle with one hand and hold it vertically with the blade facing away from you. Then hit the bottom of the handle (kashira) with your other hand until the tsuka has a tight fit and all gaps are closed.
Lay your sword back on the ground and push the mekugi in the pinholes. Take the hammer and strike it till the pegs are in their starting position again.
Great job! You have successfully dismantled your katana and assembled it again.
Katana Disassembly FAQ
How to Remove a Stuck Tsuka (Handle)?
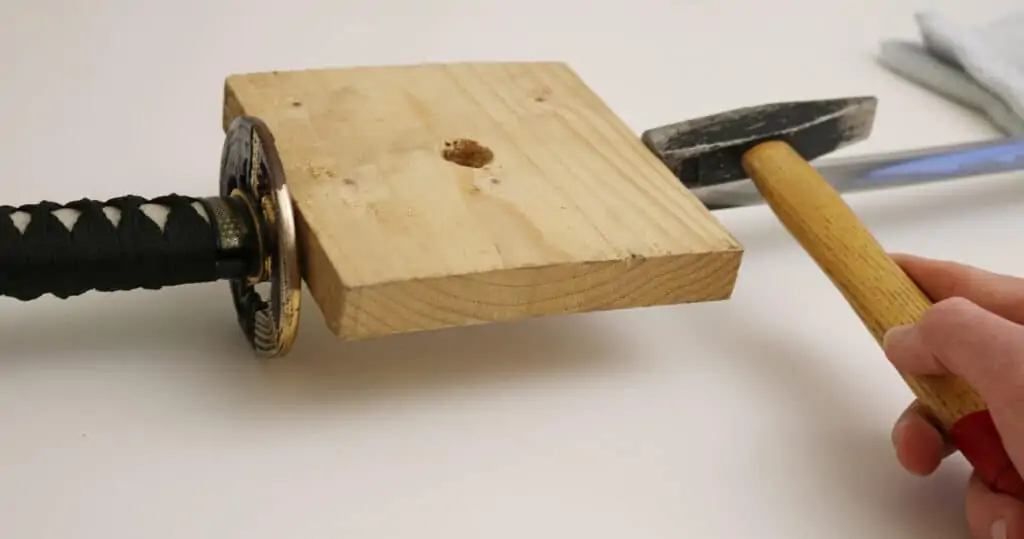
Sometimes the sword’s handle just won’t come off. This is especially true when it is your first time disassembling this particular sword.
Lay your katana on a table and get yourself a wooden block and place it on top of the guard, so that it lies on the habaki (blade collar). Grab a big hammer and slightly tap the wooden block.
Gradually increase the force. After a few strikes, you should be able to pull the tsuka from the tang.
You can replace the splint with any other item that you have around. We only need it because hammering directly on the guard would damage it.
How to Remove a Stuck Mekugi?
Before applying excessive force to remove a stuck mekugi tap the area around the peg with a brass/rubber mallet or your palm. This helps to release the accumulated tension in the handle.
Now check if the mekugi is tapered. If this is the case, make sure that you are hitting the peg from the smaller side. Otherwise, with a straight peg, the direction doesn’t matter.
Take a big hammer and start with light hits. Gradually increase the force until the peg starts to loosen. Sometimes really strong strikes are required.
When your mekugi is stuck it is very likely to get damaged when removing it, so prepare a replacement beforehand.